Texture Engraving and Branded Moleskines
A period of experimenting with texture engraving at rLab, creating bump maps from STL files, and using those textures to produce Wirehive branded Moleskines on mass.
6 min read
This post was originally published on Tumblr in February 2014 and has been migrated here.
I’ve been going through old Tumblr posts, and this one brought back memories of a period where I became obsessed with texture engraving on the laser engraver at rLab.
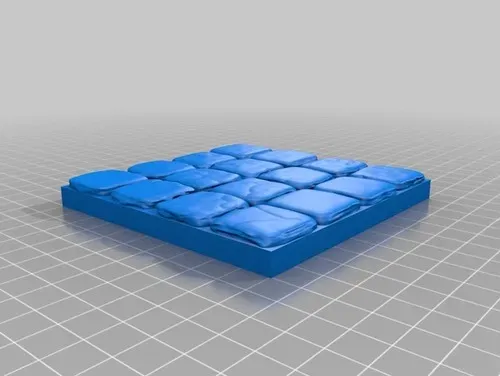
The original post is from February 2014, and it documents a technique I’d figured out for creating bump maps from STL files. I wanted to laser engrave a dungeon floor texture across a piece of acrylic for a friend who was in a wargaming club, but I couldn’t find a free texture file that looked good enough. What I did find was a 3D model of a floor tile on Thingiverse, designed to be 3D printed.
Rather than 3D printing it (which would have been horrendously inefficient and not the best resolution), I figured out a way to extract the textured surface from the STL and convert it into a PNG as a bump map.
The Process
The technique was relatively straightforward:
- Import the STL into Blender
- Align a camera so its field of view perfectly shows the textured object
- Build an image from the camera based only on the Z buffer
The key was using Blender’s compositing nodes to route the Z buffer into an image. Set the camera to orthographic, align everything nicely, and render. The result was a bump map that could be used for laser engraving.
It worked beautifully. The texture came out crisp and detailed, perfect for engraving into acrylic or other materials.
The Obsession Phase
But this wasn’t just a one-off project. I went through a period where I was texturing surfaces for all sorts of finishes on the laser engraver at rLab. I’d find interesting textures - wood grain, stone, fabric, leather - convert them from STL files or create them from scratch, and then use those textures either as they were or to deboss other surfaces.
There was something satisfying about the process. Taking a 3D model, extracting its surface texture, and then applying that texture to something completely different. It felt like a form of digital craftsmanship - translating between mediums, finding new ways to represent texture and depth.
A few weeks before the dungeon floor post, I’d documented another evening’s work: a bump map engraved proof of concept of cobblestone for modelling, an etched black iPhone, and an embossed leather wallet. These were experiments - trying different materials, different techniques, seeing what the laser could do.
The cobblestone texture was another example of extracting texture from 3D models. The iPhone etching showed that the laser could work on different surfaces - not just acrylic, but also the anodized aluminum of phone cases. The leather wallet demonstrated embossing - creating raised textures rather than engraved ones.
Each project taught me something new about what the laser could do, what materials it worked with, and how to get the best results.
Wirehive Branded Moleskines
The real application came when we decided to produce Wirehive branded Moleskines. We did this on mass - taking plain Moleskine notebooks and engraving them with custom textures and branding.
The process involved:
- Creating or sourcing texture files
- Converting them to the right format for the laser engraver
- Setting up jigs to hold the notebooks consistently
- Running batch after batch through the engraver
It was meticulous work. Each notebook had to be positioned exactly right, the engraving depth had to be consistent, and the textures had to look good on the leather-like covers of the Moleskines.
But the results were worth it. We ended up with custom-branded notebooks that felt premium, that had texture and depth, that were clearly Wirehive products. They were given to clients, used as conference swag, and became part of the company’s identity.
The Craft of Texture
What I loved about this project was the way it combined digital tools with physical results. The textures started as 3D models or digital files, but they ended up as physical engravings on real objects. There was a translation happening - from digital to physical, from screen to surface.
The laser engraver at rLab was perfect for this kind of work. It could reproduce fine details, create consistent depth, and handle batch production. But it was the process of creating the textures - extracting them from STL files, converting them to bump maps, refining them until they looked right - that was the real craft.
Looking Back
Finding this Tumblr post reminded me of that period. The experimentation, the problem-solving, the satisfaction of figuring out a technique and then applying it at scale.
The Wirehive branded Moleskines were a tangible result of that experimentation. They were products that came from a process of discovery - from wanting to engrave a dungeon floor texture, to figuring out how to extract textures from 3D models, to applying that knowledge to create branded products.
It’s a good reminder that sometimes the best projects come from following curiosity. I didn’t set out to create a process for branding notebooks. I set out to solve a specific problem - engraving a texture for a friend. But the solution led to something bigger, something that became part of how Wirehive presented itself.
Teaching the Technique
The experimentation wasn’t just personal. I ended up teaching a laser engraving workshop at rLab, sharing the techniques I’d figured out. The workshop covered bump maps, texture extraction, and how to apply these techniques to different materials.
Teaching forced me to formalize the process, to think through the steps clearly, to anticipate problems. It also connected me with other makers who were experimenting with similar techniques. The workshop became a way to share knowledge and learn from others’ experiments.
The Laser Engraver at rLab
The laser engraver at rLab enabled a lot of experimentation during that period. It was a tool that rewarded curiosity and iteration. And the texture engraving work - from that first cobblestone proof of concept, to the dungeon floor, to the branded Moleskines - was a perfect example of how experimentation can lead to practical applications.
Those Moleskines are probably still out there somewhere, in clients’ offices or on desks, with their custom textures and Wirehive branding. They’re reminders of a period of experimentation and craft, of taking digital techniques and applying them to physical objects.
And it all started with wanting to engrave a dungeon floor texture for a friend. But really, it started with curiosity - with wanting to see what was possible, with experimenting, with iterating, and with finding new ways to combine digital tools with physical craft.